FACEBOOK TWITTER PINTEREST INSTAGRAM RSS BLOGLOVIN

Tuesday, August 25, 2015

My Mini for the #amhminiquiltswap


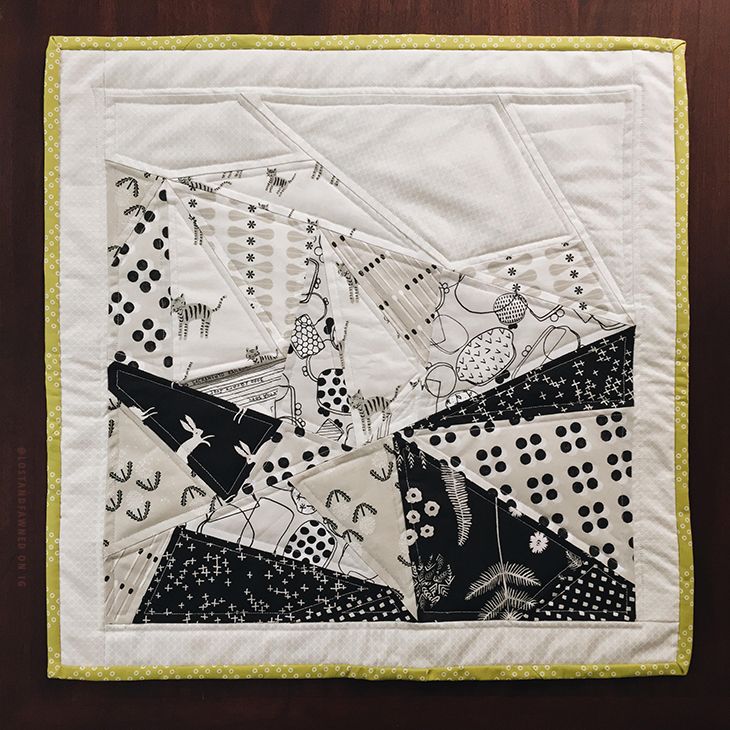
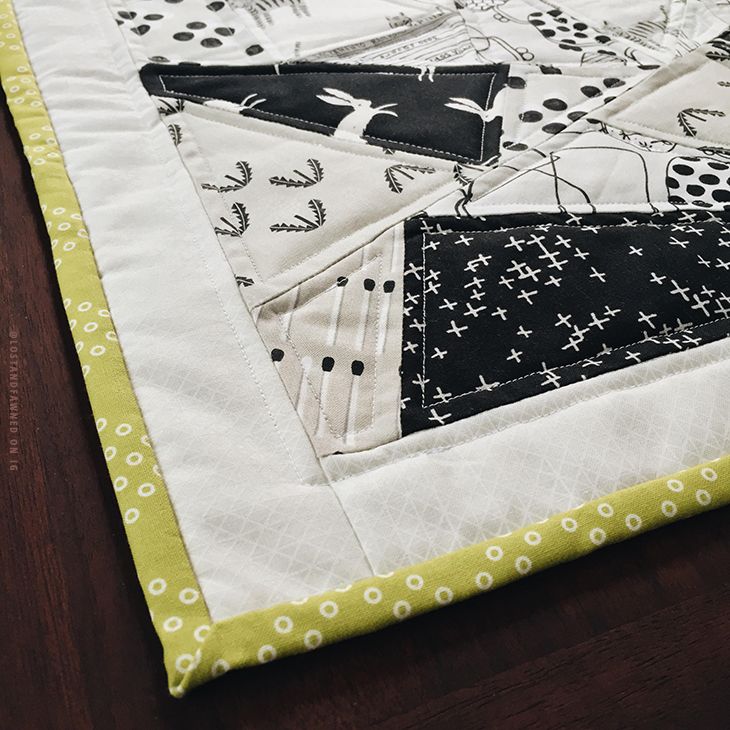
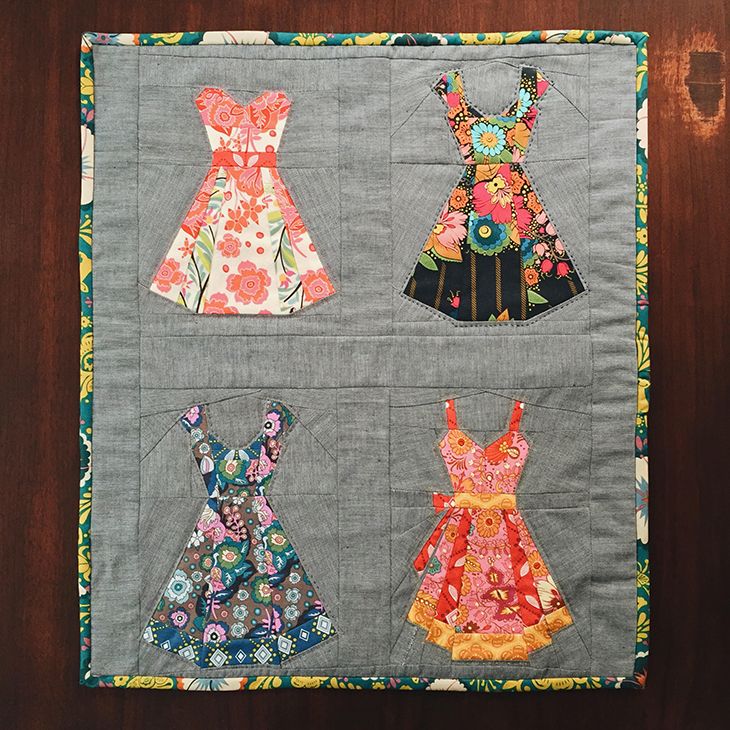
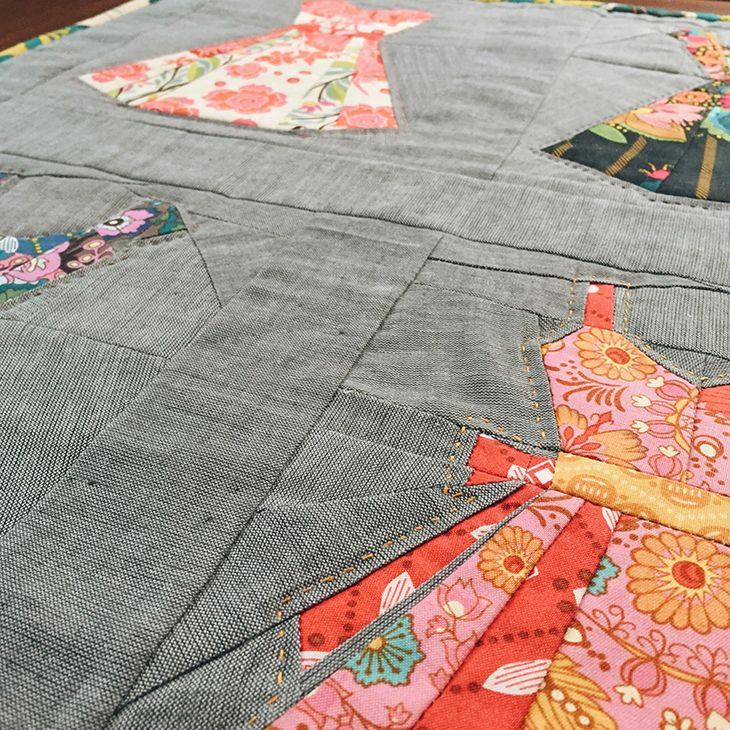
For my second quilt swap, I got a little more ambitious.  I fell in love with this vintage dress pattern and thought it would be perfect for the Anna Maria Horner florals.  I had so much fun coordinating the fabrics, fussy cutting the prints and building these darling little dresses.  The quilting was a simple hand stitch in a matching color a quarter inch outside of the dress outline. 

While the background was pretty on the roll, I would never use it again.  It's not a quilting fabric, and it had so much flex.  It was nearly impossible to work with for paper piecing.  I much prefer Essex Yarn Dyed in Black for a similar look that sews and presses really cleanly.

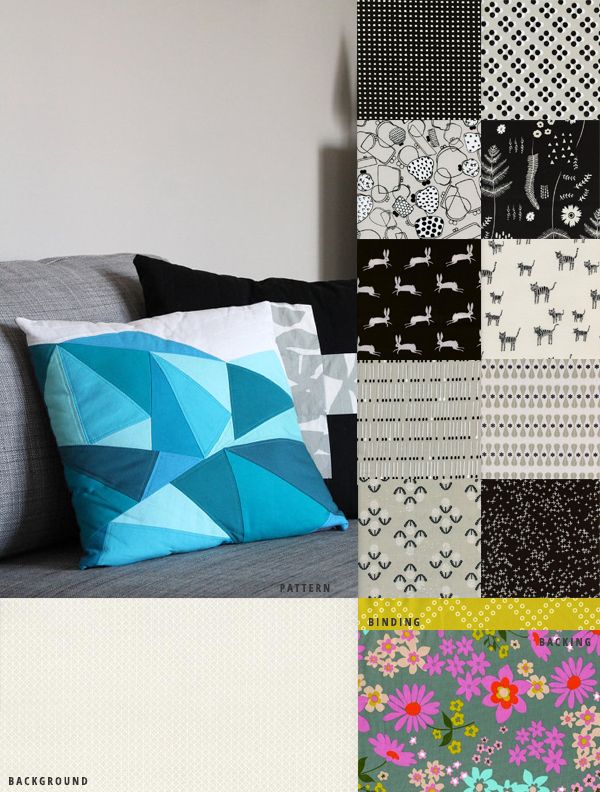
Pattern: Vintage Dresses by Charise Creates
Background:  Woven Cotton Shirting from Joann's (not available online)
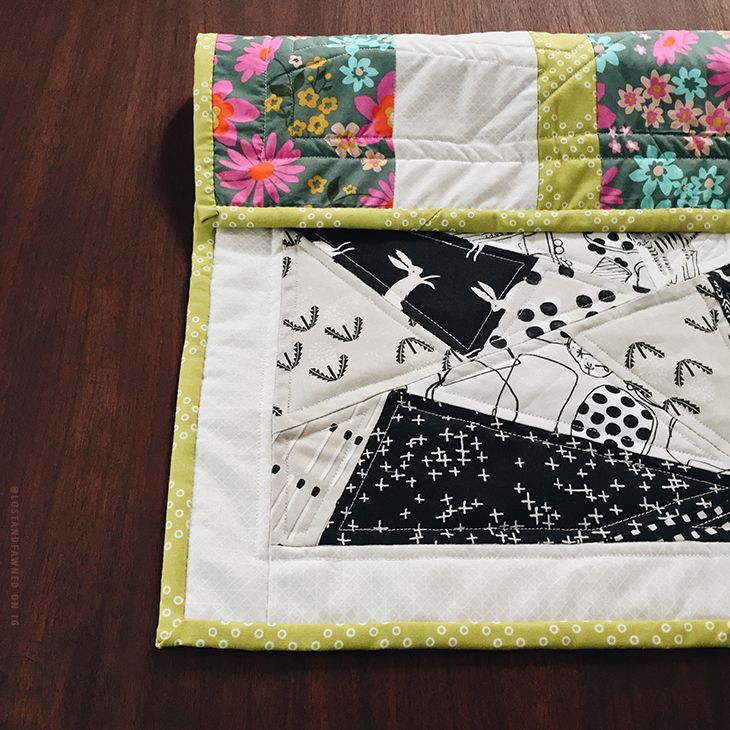
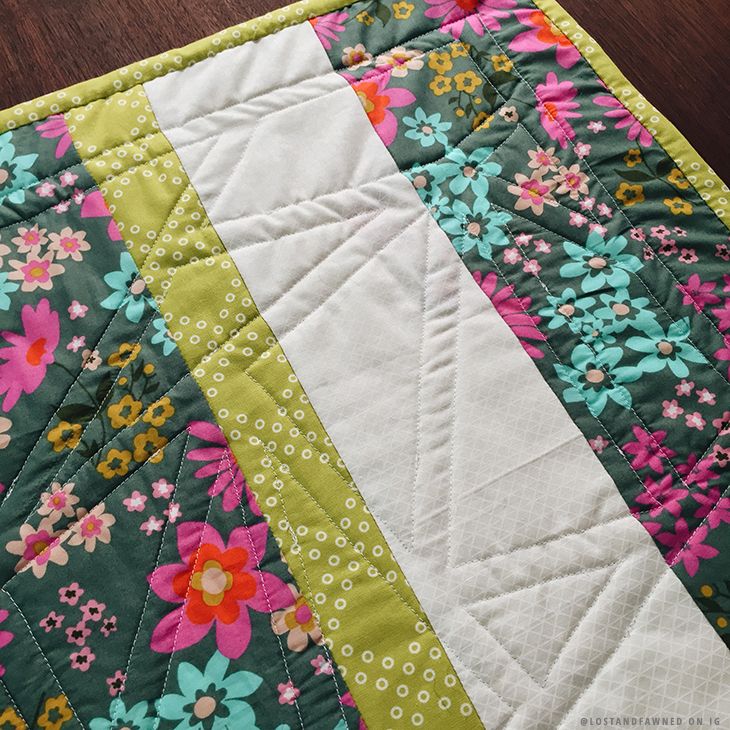
Prints:  Anna Maria Horner "Folk Song" Collection from Alewives Fabrics


I love the way it turned out despite the troubles I had with the background.  I am planning to use the pattern many times in the future for personal projects and gifts.  It's easy to follow and makes a very impressive block that is guaranteed to make the recipient swoon.

My other swaps are still in progress but I can't wait to share the finished products with you after my partner receives them.  I'll have more very soon.  be sure to follow me on Instagram to see progress on my current swap.  Are you doing any swaps this year?

Friday, August 21, 2015

My Mini Quilt for the #cottonandsteelminiquiltswap


I'm back to reveal the finished product of my very first quilt swap!  Earlier this summer I shared the plan with you.  I stayed pretty true to the original idea.  I did end up adding a border and added some strips to the back to make it wide enough.  I love the way it ended up looking!  And my partner loved it too. 

Pattern:  Geometric Mountain Range by Art School Dropout
Top Fabrics:  Black & White Collection by Cotton + Steel
Backing Fabric:  Vintage Floral in Aqua by Cotton + Steel
Binding Fabric:  Dotti's Cousin in Lime by Cotton + Steel


Since the front was fairly monochromatic, I really wanted the back to pop.  I used a cotton voile by Melody Miller (my swap buddy's favorite designer) and added a couple of panels to make it fit the width.  I love the top, but the back turned out awesome.  I love the texture of the quilting over the graphic back. 


I'm so thrilled how it turned out!  I have another swap reveal to share in the next week as well.  I'm so hooked on swaps now!  I'm finishing up 2 more swaps right now and have another one due in 2016.  

Be sure to follow me on Instagram to watch my swap progress and find out when new swaps start!

Friday, April 10, 2015

A Beginner Sewing Battlestation


Everyone has to start somewhere!  I'm not going to lie to you and tell you that sewing or quilting is a cheap hobby.  But it is a rewarding and useful skill.  I truly believe with some halfway decent tools and practice, anyone can learn to sew.

You will commonly see your sewing desk called a "battlestation" on many sewing forums and blogs.  If you are new to sewing, you don't need to spend a ton of money on the best machine or all the fancy sewing feet and cutting templates.  But there are a few places to invest.  One pair of scissors can last more than a lifetime, if they are the right pair and are taken care of.  Same with your thread snips.  I didn't include an iron in this list, since most people should have one that will work just fine as you get started. 

  1. SEAM RIPPER  ::  You might as well invest in a decent seam ripper now since it will be your friend for awhile.  I also have a cheap little one (I think it came with my machine) for getting into awkward spaces.  /  Fons & Porter Ergonomic Seam Ripper - $5.49
  2. MEASURING TAPE ::  If you are going to by buying patterns for yourself or measuring a quilt for binding, it's good to have a few of these laying around.  No need to spend a lot on them.  You will probably end up losing them or cutting them in half accidentally eventually.  /  Dritz Tape Measure - $4.92
  3. ROTARY CUTTING SET ::  People will probably fight me on this, but I think it's OK to start with a cheap beginner set like this when you first start.  They work fine and you can replace parts individually when you have coupons for a nicer cutting mat or OLFA cutter down the line.  /  Fiskars Rotary Cutting Set - $32.82
  4. WORK LAMP  ::  If you are like me and work a day job, you may end up doing a lot of your sewing in the dark.  A good desk lamp will be worth it.  An LED one like this, is great if you have to do any thread or fabric selection in the dark since it will give you truer colors that your standard lamp.  /  TaoTronics Elune Lamp - $32.99
  5. ORGANIZATION ::  Things can get out of hand really fast as your tool set and fabric collection start to grow, so stay organized from the very beginning.  My drawers are full or bowls and cups and organizers.  I use tones of plastic Ziploc bags to organize ongoing projects.  A wall rail for tools you need to keep close and handy is a great addition.  /  IKEA PS 2014 Wall Rail - $25.98
  6. SCISSORS ::  As I mentioned before, this is one of the places I would invest.  I have this pair (in a limited edition print) and they are wonderful.  Every other year I get them sharpened by a local knife sharpener and they always work beautifully.  /  Gingher 8-Inch Knife Edge Shears - $24.26
  7. DESK CHAIR  ::  Eventually you are going to want to invest in a nice chair.  What kind of chair is a very personal decision.  I don't like arms, but some people do.  A swivel base is very handy since you will likely be getting up to press and cut.  /  IKEA Torbjorn Chair - $39.99
  8. PIECING FOOT ::  If you are going to be quilting, this is a great tool as you learn.  This has a little piece of metal that helps you sew consistent 1/4" seams for piecing.  I still use this when I need to be very precise.  /  Patchwork Foot with Guide - $5.29
  9. THREAD RACK  ::  See #5.  Start organized and stay organized.  It will take you a long time to fill up a rack like this one.  Mine is much smaller and isn't even halfway full.  /  Thread Rack - $11.86
  10. THREAD SNIPS  ::  Another place it doesn't hurt to invest.  A good pair isn't terribly expensive and they will last you a long time.  I love these classic stork shaped snips.  They make me smile every time I reach for them.  /  Gingher Stork Embroidery Scissors - $13.98
  11. DESK ::  For years I just used my dining room table.  You really don't need to spend a lot of money on a desk.  Storage or cord management is a bonus.  Now I just use an inexpensive Ikea desktop and legs with drawers.  /  IKEA Micke Desk - $69.99
  12. SEWING MACHINE  ::  This is a place where I would find a happy medium.  Machines range drastically in price.  To start learning, I don't think you need to spend more than $200 on a machine.  A basic machine without all the bells and whistles will help you understand how to adjust tension and thread a bobbin.  This is actually the machine I am currently using.  Sure I would love more room in the throat or a little more speed, but this machine works and is affordable.  /  Brother CS6000i Sewing Machine - $147.81
What tools would you recommend to a new quilter or sewer?  What did I forget?  What item do you wish you had in your toolbox from the beginning?  Please share in the comments below!

Friday, March 6, 2015

Learning to Love Paper Piecing

Have you tried paper piecing?  I did a year or so ago and as much as I wanted to, I just couldn't fall in love with it.  It seemed tedious, messy and I just couldn't get into a groove.  I got frustrated and ended up throwing it into my scrap bin and calling it a day.  I was disappointed, but figured I'd just have to be happy with traditional piecing and english paper piecing.  But of course, I'm always dabbling and looking for something new to try.

Recently after running across a pin of a beautiful paper pieced block on Pinterest, I decided to give it another go. Since I've started joining a small handful or swaps, it felt like a good time to try.  Mini-quilts are perfect for practicing new techniques or blocks on a small scale. 

I started my journey with this tutorial on Sew What Sherlock.  I armed myself with a pile of scraps, a fresh needle and a large pot of tea.  The tutorial follows the Sister's Choice block, which is free in Sew What Sherlock's shop.  It's a fairly straight forward block, and could be pieced traditionally, but it would be time consuming and some of the intersection points would require extreme precision. 

This tutorial is great.  It is clear and easy to follow with great photographs and well written directions.  The technique took some getting used to.  I will admit I used my seam ripper a few times when I started, but with each piece it got easier and started feeling natural.  And the results speak for themselves.  the intersection points!  I can't get over those perfect corners!  I've never had such accurate corners with a block like this.

There are some cons.  You use quite a bit of paper.  I'll be buying a box of the cheapest copier paper I can just for this purpose.  Tearing off the paper carefully at the end takes time and is messy.  There is a little more waste than I'm used to.  But overall I'm hooked.

I've already purchased a new pattern and spent last night making a practice block.  I'm planning to use it for the Anna Maria Horner Mini Quilt swap on Intsagram.  I think it will be darling when it's finished.  Find the pattern by Charise Creates here.  Eventually I'd like to tackle Leonard the Llama by Sew What Sherlock.  I just need the right project.

Picking this technique up has opened a whole new set of doors and I can't wait to share some new projects with you.  I'm sketching some ideas for some original block designs that hopefully I'll have ready by summer.

Have you tried paper piecing?  Did you love it or hate it?  Please share your experiences and projects in the comments!

Tuesday, February 24, 2015

Cotton + Steel Mini Quilt Swap / The Plan

I'm doing my very first mini quilt swap.  I'm so nervous, but also terribly excited.  I have been issued my swap victim swap buddy and after relentless stalking research I have drafted a plan and ordered supplies!  I don't want to share too many specifics about their likes and dislikes, but I'm pretty pleased with the direction this is going and I do hope they like it.  It's going to be quite different from other minis they have received. 

I have chosen to work with the new Black & White collection that will be released in April (yay pre-order discount!!) and will be bringing in color through the binding and backing.  The paper piecing pattern is by Art School Dropout on etsy.  I think it's really going to show off the monotone fabrics to their fullest.  I'm debating on adding a border in the lightest fabric to frame it. 

I'm dying to start, but I'm glad the fabric wont arrive until April.  I have a lot on my plate to finish before I get this going.  You can follow my progress on this mini quilt and my other sewing and quilting projects on Instagram.

Are you a quilt swapper?  Any tips for a newbie like me?

Friday, February 20, 2015

Finally Finished Friday / Persimmon Patchwork Quilt


I started this one back in October.  I needed something that was easy and gratifying.  Plus I wanted to practice doing larger quilts on my little home machine.  One of my big resolutions this year is to finish some of my outstanding UFO's (unfinished objects).  I wanted to start with this one since it's HUGE and it's freezing here.

To finish it I ordered Linen Mochi Dot in Putty for the back and Gingersnap in Marionberry for the binding from Handmade is Heartmade on etsy.  The batting is my usual Warm & Natural.  I usually try to get it cut off the roll, but this deal on Amazon was too good to pass up. 

While it's fairly simple in design, it was the largest quilt I have finished.  It was challenging to get under the arm of my machine, but by the end I was getting the hang of the "stuff and fluff"method down. 


I'm thinking of doing another one with a whole bunch of Cotton & Steel charms from all their different collections, a real celebration of all of their patterns.  Watching this one come together so fast was just what I needed to re-motivate me for a great year of new quilting experiences and growth.  I'll call it my 2015 warm up!

Finnick is obsessed with this one.  If you follow me on Instagram, you know he's been curling up in it throughout the entire process.  As soon as I spread it on the bed to take some photos, he was up on top of it rolling around and smiling.  It only took 20 minutes before he was passed out on top of it. 


Friday, February 13, 2015

My Palette for the 2015 Mystery Quilt for a Cause

Last year I had a blast and met some awesome people when I participated in the first Mystery Quilt for a Cause hosted by Heather Spence and Missouri Star Quilt Company.  I made the Elevation Quilt for my grandmother, a cancer survivor. 

For those of you who are new to mystery quilts, you are given basic fabric suggestions and dimensions and every week the designer will share a new "clue" to help build your blocks.  The last week you put it all together to create your finished quilt top.  Everyone shares their progress in the forum.  I found the clues easy to follow, but if anyone has trouble, the group is more than willing to help. 

Once again, this years suggested donation is to Cancer Care.  You can find all the information and links to the donation, forums and pre-cut quilt kits here

As usual, I chose to go the route of selecting my own fabric palette.  It wasn't easy.  My budget is limited right now, but I had to participate.  So I took my coupons down to Jo-Ann's and shopped for a good hour.  This is what I ended up walking out with.  It's not perfect.  I do have a directional fabric, and the scale on some of the patterns is a little larger than I would like.  Some of my "lights" could be lighter, and some of the "darks" could be darker.  I decided to try something different and use a steel gray for the background.  Overall I like the way it looks though, and I can't wait to see what the finished quilt top will look like.

I totally didn't realize that my palette was similar to last years.  Whoops!  I guess I know what I like.  I will probably either donate or gift this one when it's finished. 

To join in on this years Mystery Quilt for a Cause, visit Missouri Star Quilt Company.  The official start date is the 20th, but I think Heather might push back the first clue to the 22nd so people have time to get their kits in order.